How to delete previous version of Windows after upgrading to Windows 10
If you are one of those first people who upgraded to Windows 10 (NOT CLEAN INSTALL) using my method 1 or method 2 that I recently share on my YouTube channel you might notice that your hard drive suddenly has less space to store. Like on my end I have a SanDisk 240GB and suddenly I just have a remaining less than 10GB after upgrading to Windows 10, and the reason behind that is your previous version of Windows is still residing on your hard drive. So that if you’re not happy with the new version you can simply revert back without formatting your system.
But in case you are happy with Windows 10 and you want to delete the previous version which is roughly 27GB here’s how simple it is.
Take note that you can’t go back to the previous version of Windows once you have done this.
First right-click on your notification center at the lower right corner of your screen and click the “All Settings”
then click the System (display, notifications, apps, power)
Look for the Storage click it, choose This PC which is the Drive C where you operating system resides
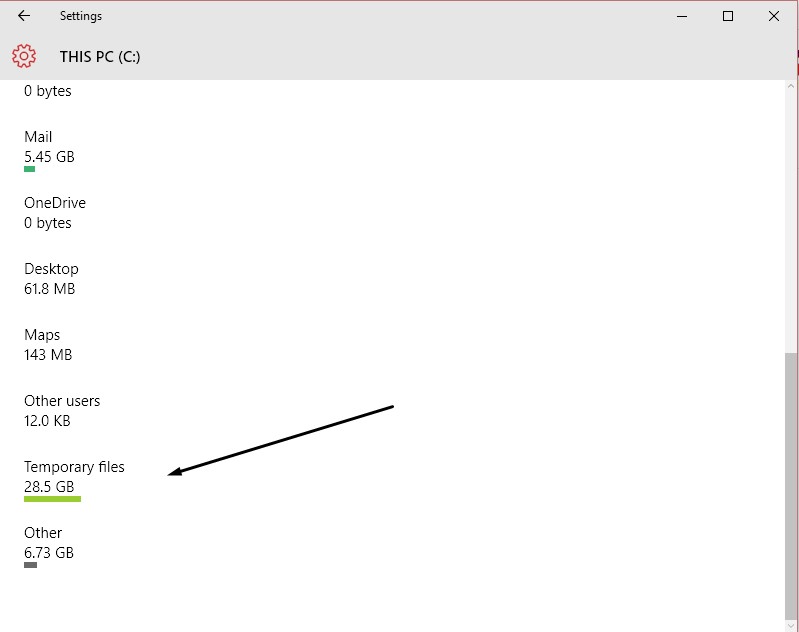
Scroll down and look for the Temporary Files

then scroll at the bottom most part and you will see “Previous version of Windows” and click Delete previous versions
and it will confirm you to delete, just wait for a couple of minutes for it to do that process.
After that you will see that the 27GB became 0bytes which mean it already deleted the previous version of Windows
There you go that’s how easy it is to delete the previous version of Windows and it gives you more space for your hard drive in case you are running out of storage.


